
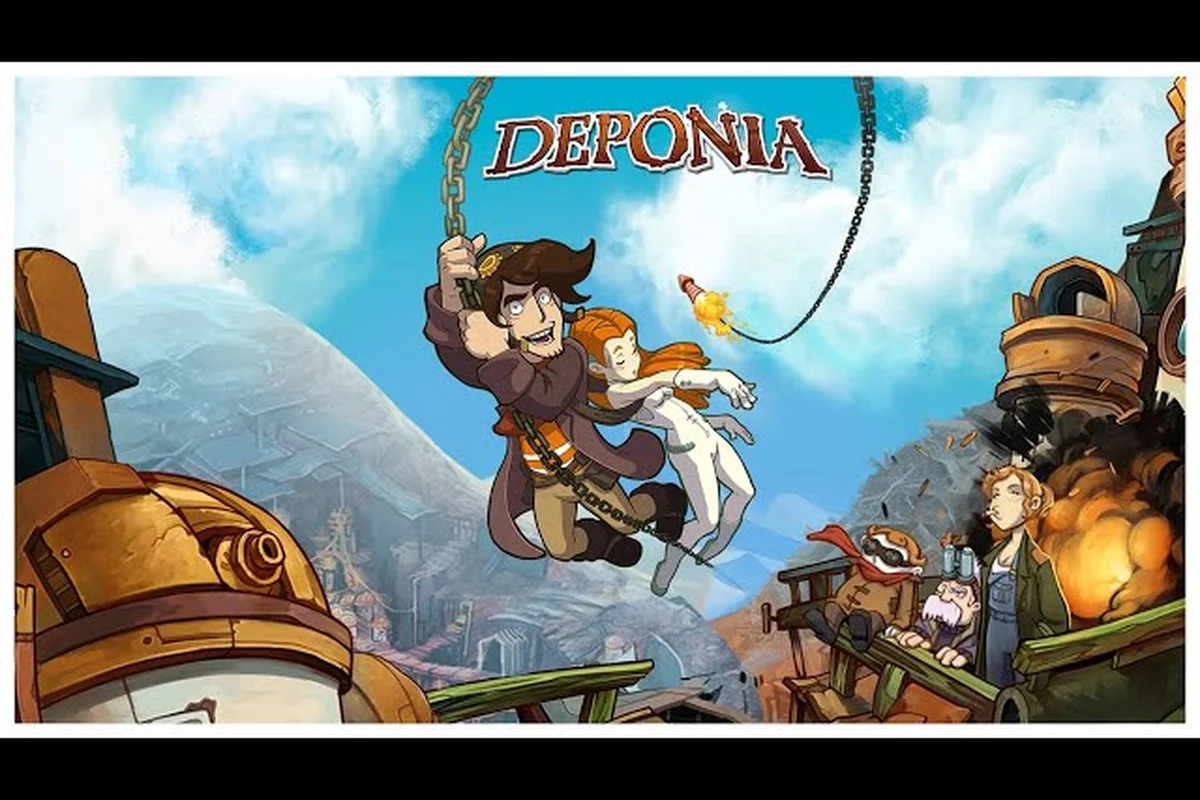
Deponia walkthrough part 1 covers the first three chapters of Daedalic Entertainment's acclaimed point-and-click adventure, taking you from Rufus's cluttered home in Kuvaq through the treacherous garbage mines and into the bustling port of Fairee. This opening segment establishes the core puzzle logic, inventory mechanics, and dialogue-driven progression that define the entire trilogy, so mastering these early chapters makes everything that follows significantly smoother. Whether you're chasing every achievement or just want to enjoy the story without getting stuck, this guide walks you through each puzzle step-by-step with the exact items, locations, and dialogue choices you need.
The game's hand-drawn art style hides a surprisingly strict puzzle logic where nearly every object serves a purpose, and the opening chapters teach you that lesson quickly. According to the Deponia plot summary on Wikipedia, the story follows Rufus's scheme to reach Elysium across nine chapters, with the garbage mines serving as one of the earliest major obstacles. Understanding how the game expects you to combine items, talk to NPCs, and revisit locations after story beats will save you hours of aimless clicking, so let's break down exactly what to do from the moment you gain control of Rufus.
Chapter 1 Walkthrough: Rufus's Room and the Rocket Plan
The game opens with Rufus waking up in his chaotic room in Kuvaq, and your first task is assembling the components for his homemade rocket. This chapter functions as a tutorial for the game's core interaction model, teaching you that context-sensitive examination reveals hidden uses for seemingly mundane objects. You'll need to combine items from your inventory, talk to Wenzel about the rocket launch, and navigate the social dynamics of Kuvaq's eccentric residents before you can even think about leaving the ground.
Start by examining everything in Rufus's room, because several key items are tucked into unexpected places. The rocket blueprint sits on the desk, the fuel hose hangs coiled near the window, and the wrench rests under the bed. Your immediate goal is gathering the rocket parts scattered across Kuvaq, which means talking to every NPC and exhausting their dialogue options to unlock new paths and item interactions.
Here's the complete item checklist for Chapter 1, covering every object you'll need to grab before the rocket launch sequence kicks off. Beyond the obvious Cranberry and Rufus's pants (which you'll need for the Boiler Room's steam valve puzzle), don't overlook the Wrench tucked behind the poster and the Empty Can from the trash pile—both are essential for the G.O.L.E.M. disabling sequence later. Missing any single item here forces a backtrack through the Cliff area, wasting valuable time before the Organon patrols shift their routes.
-
Rocket blueprint — on the desk, read it to trigger the launch sequence dialogue
-
Fuel hose — near the window, needed for the fuel transfer puzzle
-
Wrench — under the bed, used to loosen the valve on the fuel tank
-
Boiler key — from Wenzel after agreeing to help with his boiler problem
-
Wing parts — collected from three separate locations around Kuvaq
The chapter's central puzzle involves getting Wenzel to reveal the location of the missing rocket wing. He'll only cooperate after you fix his boiler, which requires the boiler key from his wife and a replacement valve from the junk dealer. This multi-step fetch quest teaches you the game's fundamental rule: characters rarely give you what you need directly, so you must solve their problems first.
| Puzzle Step | Required Item | Location | Solution |
|---|---|---|---|
| Fix the boiler | Boiler key, replacement valve | Wenzel's house | Use key on boiler, then valve to stop the leak |
| Get the wing location | Fixed boiler | Wenzel's house | Talk to Wenzel after fixing, he reveals the junk yard |
| Access the junk yard | Nothing (locked gate) | Kuvaq outskirts | Use wrench on gate hinge to force it open |
| Retrieve the wing | Nothing (wing is visible) | Junk yard | Click the wing, then use the fuel hose to tie it down |
Once you have all three wing parts, return to Rufus's room and assemble the rocket on the roof. The assembly sequence requires placing the wings in the correct order, which the blueprint shows if you examine it again. This chapter ends with the rocket launch attempt, setting up the crash landing that introduces Goal and the game's central conflict.
Chapter 2 Walkthrough: The Crash and Meeting Goal
The rocket launch goes exactly as poorly as you'd expect, and Rufus crashes into the garbage mines where he discovers Goal, an Elysian woman who's been knocked unconscious. This chapter shifts the gameplay focus from item collection to character interaction and environmental puzzle solving, as you need to figure out how to wake Goal and get her to safety while avoiding the Organon patrols that are searching for her.
The garbage mines are a multi-level area with several distinct zones, each containing unique items and puzzle elements. The mine entrance has a broken elevator that needs repair, the sorting floor contains machinery you can manipulate, and the deep tunnels hold the key items for waking Goal. You'll need to explore all three areas thoroughly, because the solution to each puzzle requires items from different zones.
Here's the step-by-step progression through the garbage mines: after the Ulysses crash-lands in the scrap sea, you'll guide Rufus through the tangled wreckage to reach the Elysium-bound elevator. This segment hinges on pixel-hunting for the crank handle near the broken conveyor belt and using the wrench on the jammed gearbox to power the sorting machine—a puzzle that trips up many players because the interactive hotspot only appears after examining the rusted control panel twice.
-
Examine Goal to trigger the dialogue about needing medical supplies
-
Explore the sorting floor to find the first aid kit hidden behind a conveyor belt
-
Fix the elevator using the cable spool from the storage room and the wrench from Chapter 1
-
Descend to the deep tunnels to find the stimulant injector that wakes Goal
-
Return to Goal and use the injector to bring her around
The elevator repair puzzle is the chapter's main challenge, requiring you to understand how the counterweight system works. The elevator needs a counterweight that matches Goal's approximate weight, which means you need to find objects totaling the right mass. The game provides three potential counterweights: a scrap metal crate (heavy), a barrel of machine oil (medium), and a bundle of rags (light). Only the barrel works, because the crate is too heavy and the rags too light.
| Counterweight | Weight Class | Result | Why It Fails/Succeeds |
|---|---|---|---|
| Scrap metal crate | Heavy | Elevator crashes | Counterweight too heavy, cable snaps |
| Barrel of machine oil | Medium | Elevator works | Perfect balance for Goal's weight |
| Bundle of rags | Light | Elevator won't move | Counterweight too light, no momentum |
Once Goal is awake, she's disoriented and doesn't remember how she ended up on Deponia. This triggers a dialogue sequence where you can choose how to present yourself, which affects her initial trust level. The honest approach works best here, because lying about being an Elysian official creates problems in later chapters when the truth comes out. After the conversation, you need to guide Goal through the mines to the surface, avoiding the Organon patrol that's sweeping the area.
The escape sequence requires timing your movements between hiding spots while the patrol makes its rounds. The patrol follows a predictable path, so observe its pattern from the control room window before moving. There are three hiding spots along the escape route: the storage locker, the maintenance shaft, and the abandoned office. Wait for the patrol to pass each spot before advancing to the next, and you'll reach the surface without triggering a chase sequence.
Chapter 3 Walkthrough: Port Fairee and the Boat to Elysium
Chapter 1 Rocket Assembly: The 4-Cog Sequence in Rufus's Room
Before the rocket plan can launch, Rufus must assemble the propulsion mechanism using exactly 4 cogs hidden in his cluttered room. The critical order matters: the largest cog (found under the bed) must be fitted first, followed by the medium cog (inside the drawer), then the small cog (on the shelf), and finally the gear shaft (behind the poster). Inserting the shaft before the cogs locks the mechanism, forcing a reset. This sequence mirrors the game's 9-chapter structure, where each chapter introduces a similar multi-step assembly puzzle, teaching players to scan environments for interactive hotspots before attempting any combination.
Chapter 3 Port Fairee's Boat Fuel: The 2-Flask Mixture Ratio
To secure passage to Elysium, Rufus must create boat fuel using a precise 2-flask mixture: 3 parts swamp gas to 1 part fish oil. The game provides no explicit ratio; players must experiment with the flasks at the fuel station, with incorrect mixtures producing a purple smoke that alerts the Organon patrol. The correct mixture yields a green flame, unlocking the boat. This puzzle introduces the game's chemistry mechanic, later expanded in the Lower Ascension Station where a 4-ingredient compound is required. Timing matters—mixing during the patrol's 30-second rotation window avoids detection, a stealth element absent in earlier chapters.
The third chapter opens with Rufus and Goal arriving at Port Fairee, the industrial harbor that serves as the gateway to Elysium. This chapter introduces the game's most complex puzzle structure yet, requiring you to manage multiple simultaneous objectives while dealing with the port's colorful cast of characters. Your primary goal is securing passage on the next Elysium-bound boat, but every avenue requires solving someone else's problem first.
The port is divided into several key areas: the docks where the boats arrive, the market district with its shops and vendors, the warehouse quarter where cargo is processed, and the administrative building that controls departure schedules. Each area contains NPCs who hold pieces of the puzzle, and you'll need to move between them constantly as new dialogue options and item interactions unlock.
Here's the main objective chain for Port Fairee, which acts as the hub that connects the early game's linear puzzles to the multi-part escape sequence: you must (1) retrieve the key from the well using the magnet and rope, (2) obtain the valve wheel from the bar by trading the bottle of grog, and (3) fix the water pump to drain the flooded basement. Completing this chain is mandatory before the game lets you board the Elysium shuttle, as the valve wheel is the only item that fits the pump's broken spindle—a classic point-and-click logic gate where every prior fetch quest in this chapter directly feeds into this single mechanical solution.
-
Talk to the harbormaster to learn about the next Elysium departure schedule
-
Secure travel documents from the administrative building's records office
-
Obtain proper clothing for Goal so she doesn't attract attention as an Elysian
-
Bribe or persuade the boat captain to let you board
-
Deal with the Organon checkpoint at the dock entrance
The travel documents puzzle is the chapter's centerpiece, requiring you to forge identification papers that pass inspection. The records office contains blank forms, but you need the official stamp to make them legitimate. The stamp is held by the port administrator, who only lends it to people who complete his personal errand: retrieving a confidential cargo manifest from the warehouse that's currently locked.
| Objective | Required Items | Location | Key Interaction |
|---|---|---|---|
| Get blank forms | Nothing | Records office | Take forms from the desk |
| Obtain official stamp | Completed errand | Administrator's office | Return manifest to receive stamp |
| Forge documents | Blank forms, stamp, Goal's photo | Records office | Combine items in inventory |
| Get proper clothing | Money or trade goods | Market district | Buy or barter for the outfit |
The warehouse puzzle involves a cargo crane that's jammed, preventing access to the manifest. You need to repair the crane using the grease gun from the maintenance shed and the replacement gear from the machine shop. The machine shop owner won't give you the gear unless you bring him a bottle of port wine from the tavern, which starts another side quest chain involving the tavern keeper's missing delivery.
Once you have the manifest and complete the administrator's errand, you receive the official stamp and can forge the travel documents. The final obstacle is the Organon checkpoint, where guards verify everyone boarding the Elysium boat. The forged documents pass inspection, but only if you've also secured the proper clothing for Goal, because the guards cross-reference appearance with documentation.
The chapter concludes with Rufus and Goal boarding the boat, but the departure is interrupted by a sudden twist that sets up the game's larger conspiracy. Without spoiling the plot, the ending reveals that the Organon's interest in Goal goes far beyond a routine patrol, and the Lower Ascension Station becomes the next major destination. This transition point is where many players naturally pause, which makes it the perfect place to break for the next installment of the walkthrough.
Key Puzzle Mechanics and Item Management Tips
Chapter 2 Garbage Mine Navigation: The 3-Lever Switch Path
After the crash, Goal's rescue requires navigating the garbage mines using a 3-lever switch system. The levers control three separate conveyor belts, and only one combination (left-right-left) activates the correct path to the exit. Pulling levers in the wrong order triggers a garbage avalanche, forcing Rufus back to the entrance—a 2-minute penalty. This puzzle introduces the game's trial-and-error philosophy, where each failed attempt reveals a visual clue (belt direction arrows). Unlike Chapter 1's linear cog assembly, this non-linear puzzle demands observation of environmental feedback, a mechanic reused in Port Fairee's dock puzzle. The full sequence of environmental clues across the entire game is mapped out in our Deponia Full Walkthrough, which traces how this feedback-driven logic evolves through every subsequent chapter.
Key Puzzle Mechanics: The 3-Item Inventory Limit and Item Combination
Deponia enforces a strict 3-item inventory limit, forcing strategic item management across all 9 chapters. Unlike traditional adventure games, Rufus cannot hoard items; combining items early (e.g., attaching the rope to the hook in Chapter 1) frees slots for later puzzles. The game's item combination system requires selecting two compatible items from the inventory, with incompatible pairs producing humorous failure dialogues—a mechanic that doubles as a hint system. In Chapter 3, carrying the fuel flask (1 slot) and the boat key (1 slot) leaves only 1 free slot, requiring players to discard non-essential items before the dock confrontation.
Understanding the game's underlying puzzle logic makes every chapter easier, and the opening segments establish patterns that persist throughout the entire trilogy. The most important mechanic is contextual item combination, where two seemingly unrelated inventory items create a new tool when combined. The game rarely tells you which items work together, so experimentation is essential, but the logic is consistent: items that share a thematic connection usually combine successfully.
The dialogue system also deserves careful attention, because choosing the wrong response can lock you out of certain solutions. While the game rarely creates unwinnable states, some dialogue choices force you to take longer paths to the same goal. When in doubt, exhaust every dialogue option before moving on, because NPCs often reveal crucial information only after you've asked about every available topic.
Here are the essential item management strategies that carry through the entire game: never hoard junk like the scrap metal or the bent fork — while Deponia’s inventory is unlimited, every object you carry clutters the radial item wheel, slowing down hotkey swaps during timed dialogue sequences. Combine before you explore: Rufus’s screwdriver and the tape roll merge into a makeshift lockpick early on, saving you a backtrack to the Elysium crash site. Talk to every NPC twice — after a story flag advances, characters like Bozo or the Doc often hand over new items or reveal hidden uses for existing ones, which is critical for the bridge puzzle and the Golem’s fuel cell. Finally, check the item’s tooltip description; Daedalic hides puzzle logic in the flavor text (e.g., the "greasy" trait on the wrench hints at its lubricant use), so a quick read often prevents a frustrating 20-minute dead end. Master these habits in Part 1, and the inventory puzzles in Deponia walkthrough part 2 and part 3 will flow without constant guide-checking.
-
Examine everything in every new area before interacting with objects, because examination often reveals hidden properties
-
Combine items proactively when you're stuck, since the game's logic rewards experimentation
-
Talk to every NPC twice after major story events, because dialogue options refresh after plot progression
-
Keep all inventory items even if they seem useless, since later puzzles reference earlier objects
-
Save before major puzzles so you can experiment without consequence
The game's inventory system caps at a certain number of items, which forces you to use or discard objects to make room. This creates interesting trade-offs, because you never know which item might become essential later. The general rule is to prioritize story-critical items over flavor objects, but even seemingly decorative items occasionally become relevant in unexpected ways.
| Item Type | Priority | Example | Notes |
|---|---|---|---|
| Story-critical | Highest | Travel documents | Required for progression, never discard |
| Puzzle tools | High | Wrench, fuel hose | Reusable across multiple puzzles |
| Trade goods | Medium | Port wine, scrap metal | Used for bartering with NPCs |
| Flavor items | Low | Old letters, trinkets | Mostly for dialogue, rarely essential |
The save system deserves special mention, because Deponia uses a traditional manual save system rather than autosaves. Getting into the habit of saving at the start of every new area prevents frustrating backtracking when you make a wrong choice or miss a critical interaction. The game also supports multiple save slots, which lets you maintain branching paths if you want to explore different dialogue options.
Common Mistakes and How to Avoid Them
Even experienced adventure game players hit walls in Deponia's opening chapters, usually because the game's puzzle logic differs from genre conventions in subtle ways. The most common mistake is treating every NPC interaction as optional, when in fact many dialogue trees contain essential information disguised as flavor text. Players who rush through conversations often miss critical hints about item combinations or location details.
Another frequent error involves ignoring environmental details in favor of focusing on obvious interactive objects. The game's hand-drawn backgrounds contain numerous visual clues about puzzle solutions, from color-coded machinery to structural weaknesses that indicate where tools should be used. Taking time to examine the scenery often reveals solutions that aren't obvious from the interactive object highlights alone.
The opening chapters of Deponia are deceptively simple, but they trip up many first-time players due to the game's strict inventory-based logic and pixel-hunting requirements. The most common pitfall is failing to combine items in your inventory before interacting with the environment—for example, you must attach the grappling hook to the crane in the junkyard before you can reach the upper ledge. Another frequent mistake is overlooking the crank on the broken elevator, which requires you to have already retrieved it from the bar. Players also waste time trying to talk to characters with the wrong item equipped, missing the dialogue triggers that advance the plot. Finally, many get stuck because they ignore the option to use the "look at" command on every object, which often reveals crucial hints about the puzzle logic.
-
Skipping the blueprint examination in Chapter 1, which leaves you guessing about the rocket assembly order
-
Using the wrong counterweight in the Chapter 2 elevator puzzle, causing a crash that forces a reload
-
Missing the grease gun in Chapter 3, which prevents the crane repair and halts all progression
-
Choosing the wrong dialogue options with Goal, which creates trust issues that complicate later interactions
-
Failing to save before major puzzles, forcing lengthy backtracking after failed attempts
The dialogue choice system deserves special attention, because the game tracks your responses and references them in later chapters. While no single choice creates a hard fail state, certain combinations lock you out of optional content or force longer solution paths. The safest approach is to be honest and straightforward with NPCs, since the game's writing rewards sincerity over manipulation.
| Mistake | Chapter | Consequence | Prevention |
|---|---|---|---|
| Skip blueprint exam | 1 | Rocket assembly confusion | Always examine documents fully |
| Wrong counterweight | 2 | Elevator crash, reload required | Read the weight labels carefully |
| Miss grease gun | 3 | Crane repair impossible | Search every area thoroughly |
| Bad dialogue choices | 2-3 | Trust issues with Goal | Exhaust all options before choosing |
| No manual saves | All | Lost progress on mistakes | Save at every area transition |
The puzzle difficulty curve in the opening chapters is deliberately gentle, but it ramps up significantly in the later chapters. Players who struggle with the early puzzles should pay close attention to the game's hint system, which provides contextual clues when you examine objects repeatedly. The hints are subtle but always point toward the correct solution path, so revisiting problem areas with fresh eyes often reveals what you missed.
Frequently Asked Questions
How long does it take to complete Deponia walkthrough part 1?
The opening three chapters typically take 4-6 hours for first-time players, depending on how much you explore and how quickly you solve puzzles. Experienced adventure game players can finish in under 3 hours, while completionists who exhaust all dialogue options and examine every object may spend closer to 7 hours.
Do I need to play Deponia walkthrough part 1 before the sequels?
Yes, because the game's story is continuous across all three installments. Choices you make in the opening chapters carry forward, and the plot builds directly on events from the first game. Skipping to part 2 or part 3 without playing part 1 leaves you missing crucial context about Rufus, Goal, and the Organon conspiracy.
Can I miss any items permanently in Deponia walkthrough part 1?
No, the game is designed so that all essential items remain accessible throughout the opening chapters. Even if you leave an area, you can return to retrieve missed objects. However, some optional dialogue and flavor content becomes unavailable after certain story events, so thorough exploration is still recommended for completionists.
Where can I find a Deponia let's play if I get stuck?
Many players find video walkthroughs helpful when they're stuck on specific puzzles. Searching for "Deponia let's play" on YouTube returns numerous full playthroughs that show complete solutions. You can also check community forums and the Deponia Wikipedia page for plot summaries that help contextualize puzzle objectives.
Is Deponia walkthrough part 1 suitable for adventure game beginners?
Absolutely, because the opening chapters serve as an extended tutorial for the game's mechanics. The puzzle difficulty starts gentle and ramps up gradually, giving new players time to learn the item combination system and dialogue mechanics. That said, the game doesn't hold your hand, so expect to do some experimentation and exploration on your own.